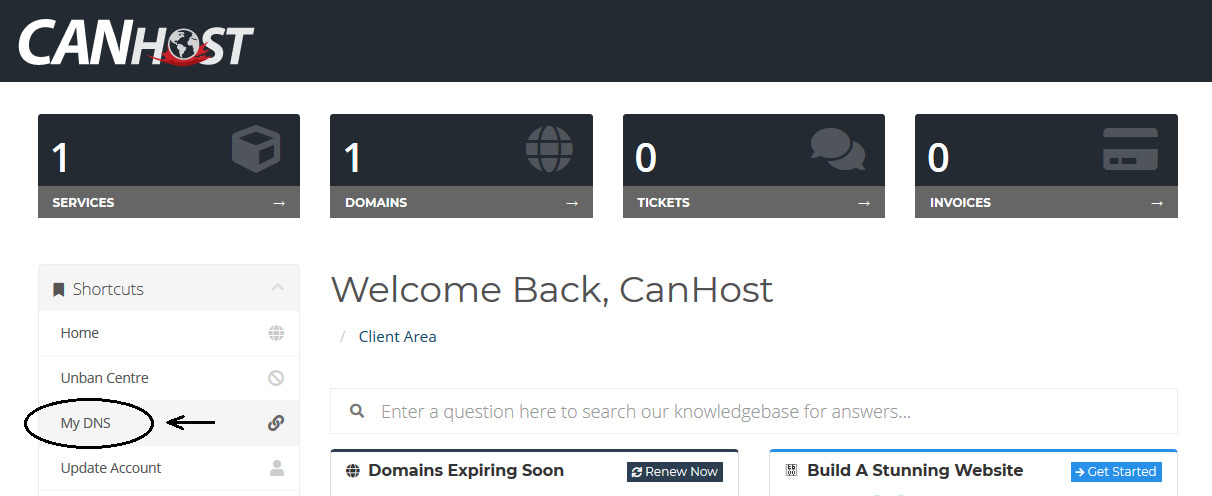
To update your DNS records, first navigate to your Client Area by logging in to canhost.ca. Navigate to the 'Shortcuts' list on the left, and select the list item called 'My DNS'.
This will open up your DNS manager, which displays all of your active DNS zones and their corresponding domain names. To edit a specific zone, click on the Edit Zone button on the right hand side. This will allow you to edit the individual DNS records for this domain.
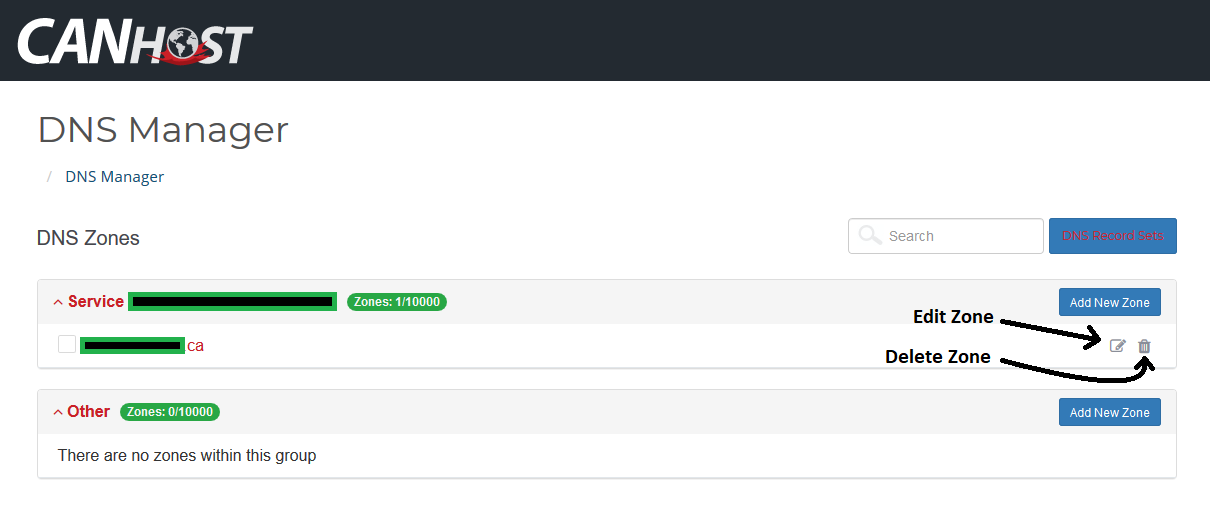
Note: These DNS records are stored on the nameservers (authoritative servers) for this domain which then makes them available to the internet-at-large. You can specify your own nameservers for branding purposes, but in general we recommend sticking with the default selection provided by CanHost.
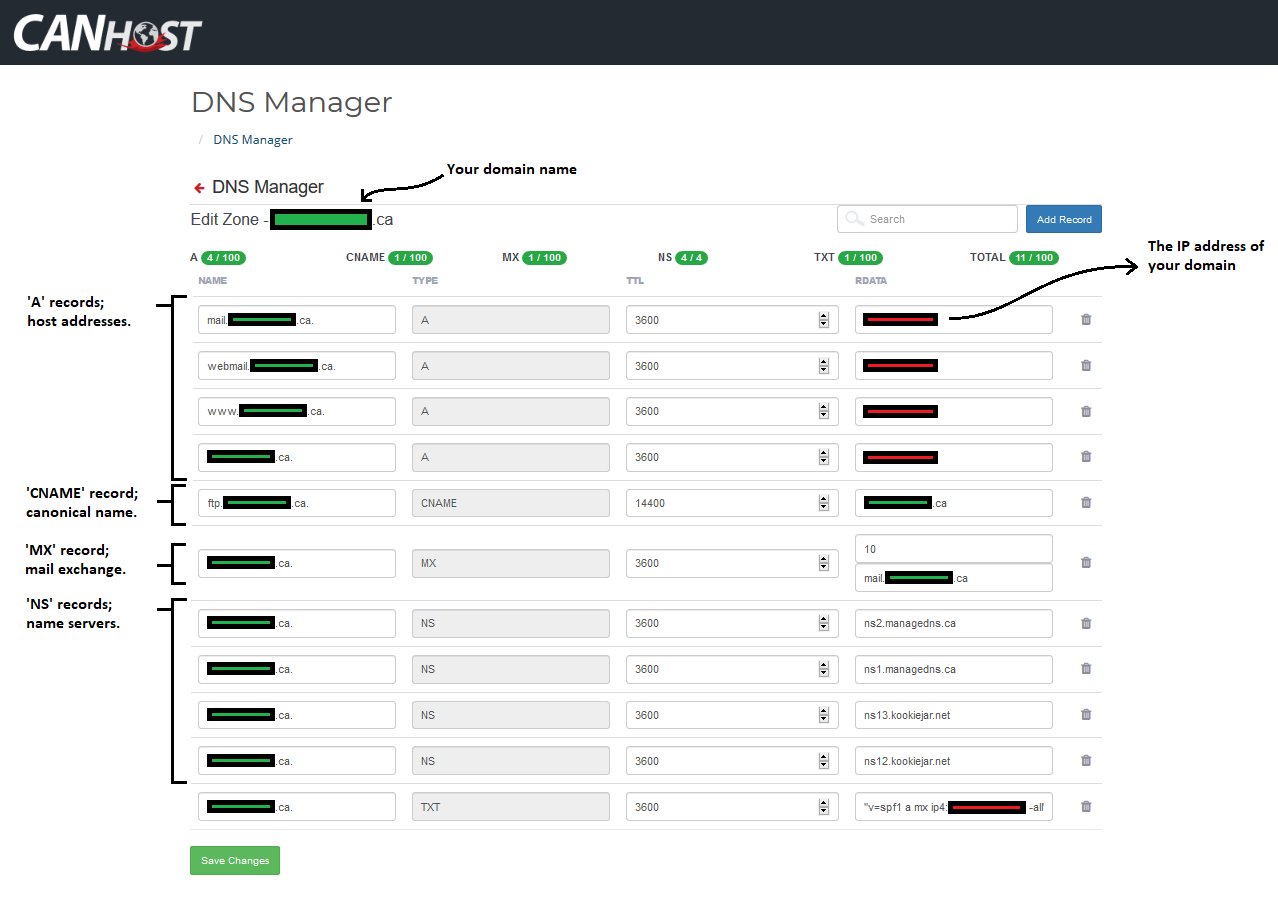
Once you click 'Edit Zone' within the DNS manager, you may access your DNS records directly. The TYPE field describes the record in each row. The TTL field is Time To Live, where the number given is time in seconds. There are 3600 seconds in 1 hour, and 14400 seconds in 4 hours. TTL informs us how long it takes for a cached record to expire - meaning that computer systems using DNS will attempt to gain an updated record after this elapsed time.
Many other record types exist, but for this example we will be focusing on those present below.